
So you want to create a website with Wix, but it seems scary and complicated? It’s ok, we’ve all been there! It’s not scary and it’s not complicated! In this article, I’ll show you how to get a business website up in under 1 hour.
Wix is a fantastic tool to create your website. In my view, it’s the quickest and easiest way to get a website up. Their drag and drop editor is the best out there. They also have excellent help functionalities.
If you’re a new visitor to my site, then welcome! I set up this site to help people attain financial freedom and quit their jobs. For example, I wrote this article that compares Wordpress, Wix and custom websites. All of the images in this article pop out into a slideshow.
If you want to get notified of my new content, make sure to follow me on Twitter and sign up to my email list.

Wix is a website builder that’s used by over 100 million people. If you want to get your website up quickly and cheaply, then it’s the best option. There’s a few reasons for this:
- Wix is an all in one solution. They take care of Hosting, Domains and Web Design
- Because they control everything, their help support is very good
- Automatic website backups keep your website safe
- Their drag and drop website builder is best in class
So should you create a website with Wix? If you’re starting up and looking to save money, then I think you should use it. There’s no better and easier website builder out there.
As you grow, you’ll need to get a professional web designer in. If so, then you should look at the service I offer. I’ve partnered with a web design agency in Mumbai. We can build beautiful websites at 1/3 of the cost of the US. Full details are on this page.

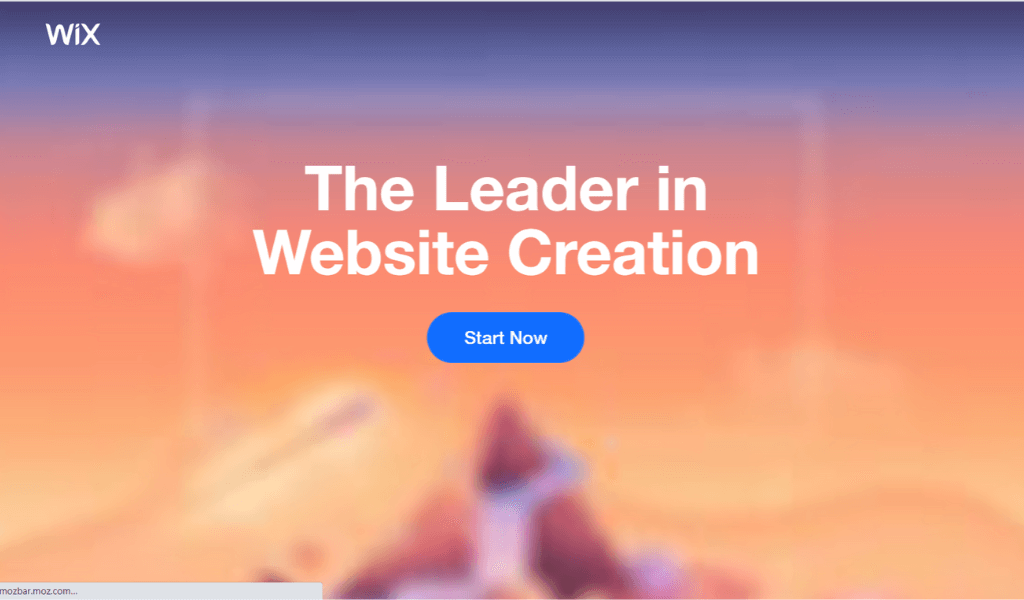
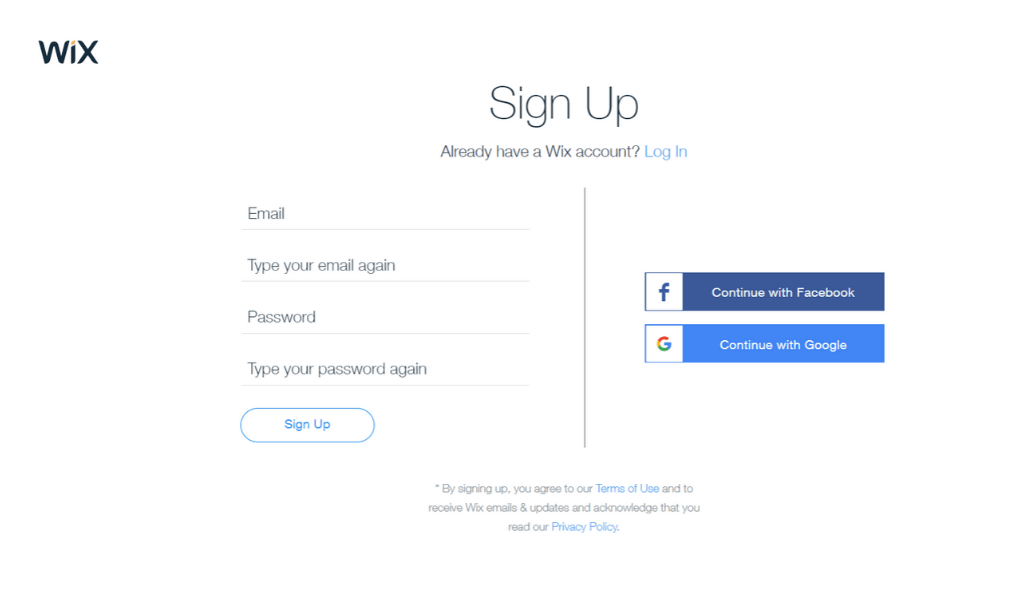
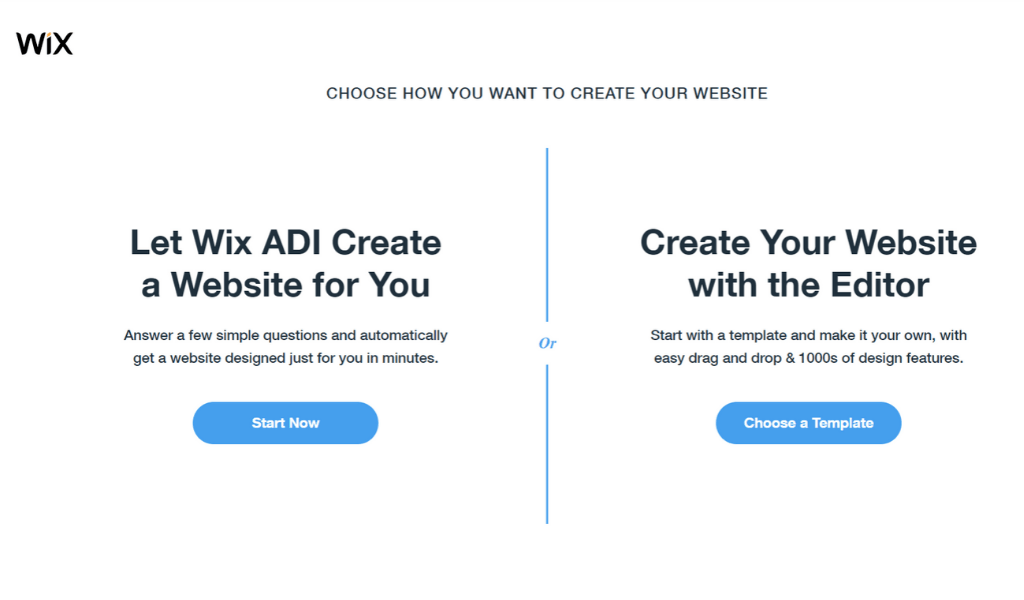
Let’s get started and build your website! Go to Wix and you’ll be greeted by the above image. Then click “Start Now”. You’ll then get to the login screen below. Either sign up for a new account, or log in with your existing credentials.
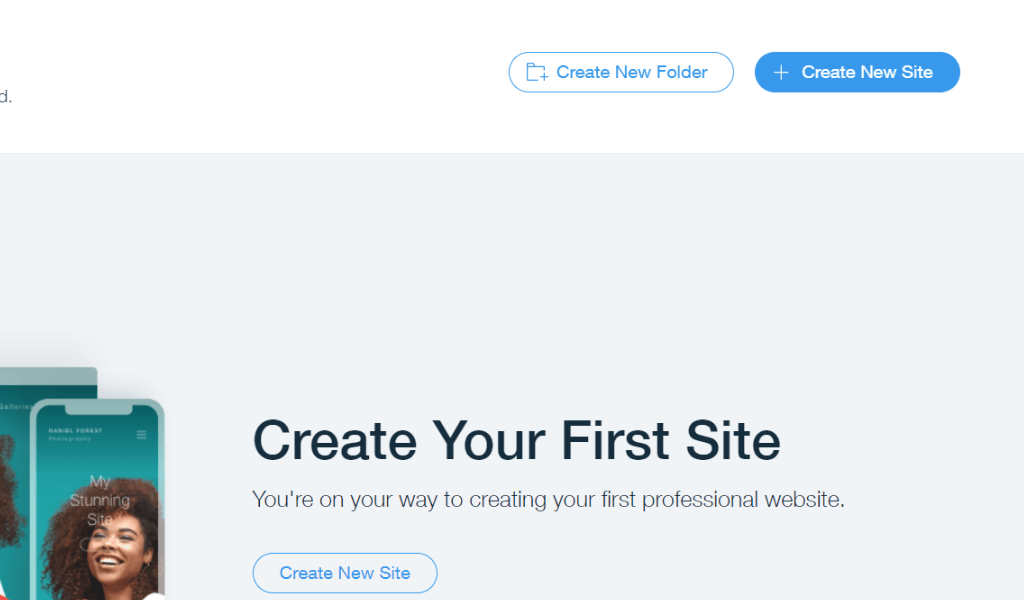
Once you logjn, you’ll arrive on your dashboard. To create a new website, click “Create New Site” on the top right hand corner of the screen.
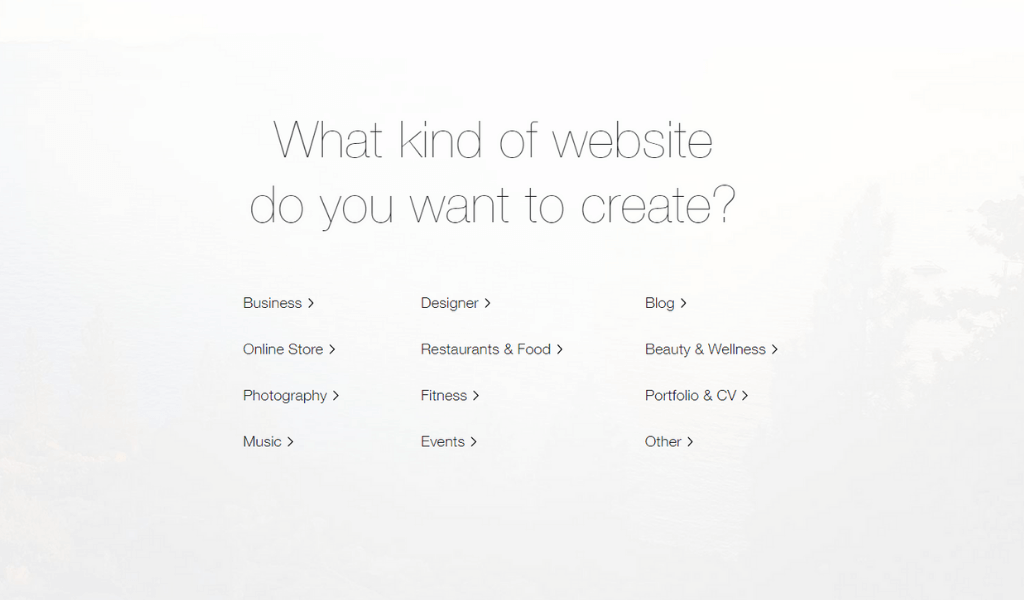
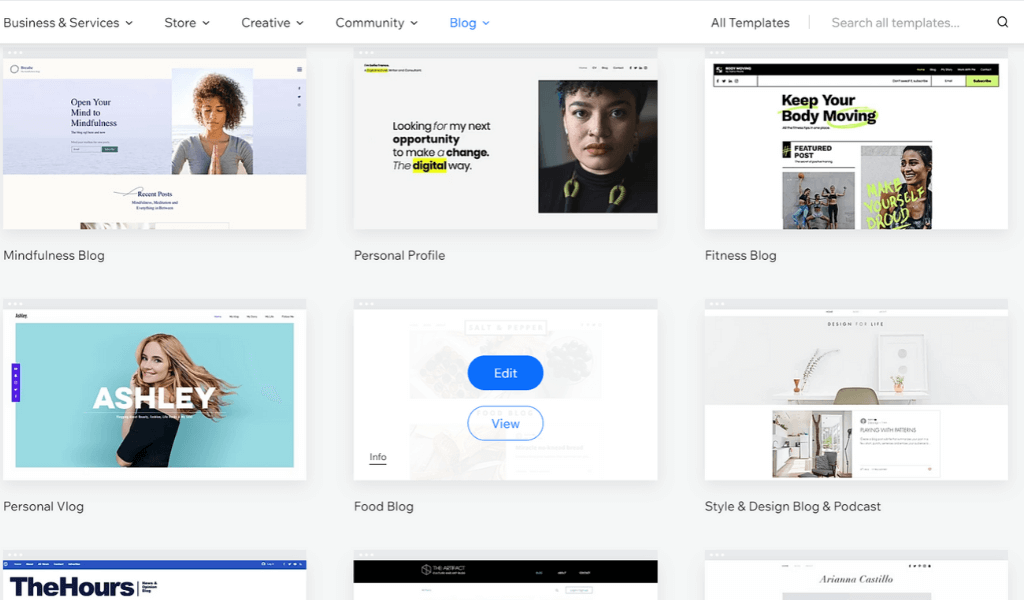
On the next page (screenshot below), choose the type of website you want. There are 12 categories. This step really isn’t important, as you can still choose any template later on. For this article, I’ll choose “Blog”.
On the next screen, you are two options
- Let Wix ADI Create a Website for You
- Create Your Website with the Editor
To create a website with the editor, press “Choose a template”. I’ve given a screenshot below.
On the next screen, you choose the template for your website. This is obviously an important step, so I recommend to take some time. As you scroll down, you can see each blog template. As you hover over each template, you can click ‘View’ to see what the website looks like. You can also click “Edit”, to start creating your website.
For the purposes of this article, I’ll create a food blog. For no other reason than that I’m hungry right now! You’ll then be taken to the website editor – screenshot below.
.png)

You’ll need to decide on your domain name and your price plan.
By default, you’re given a free domain name by Wix. The default domain name is something like [name].wixsite.com/mysite. A website address like this is completely unsuitable for a business. These days, customers don’t spend money with businesses that refuse to pay $10 for a proper domain name.
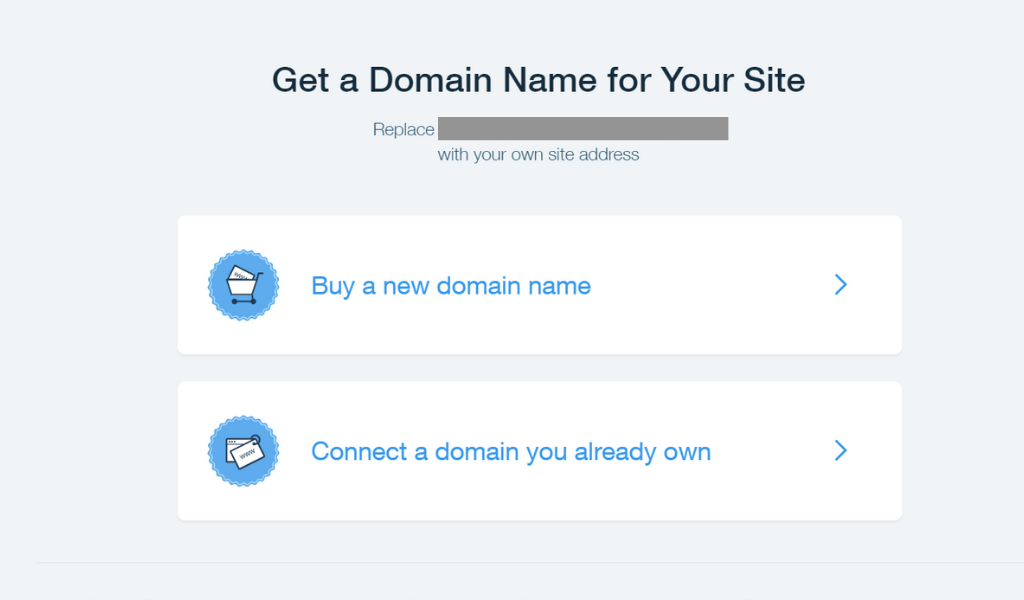
To buy a domain, go to “Settings” on the top toolbar. Then press “Connect Domain” (screenshot above)
You’ll then get to the below screen. Choose “Buy a new domain name” to buy one from Wix
You then have the option to choose from different price plans. Wix have a number of different price plans that change over time. I’ll focus on the 3 cheapest plans here: Free, Combo and Unlimited. These price plans are most suitable for new business websites.
Free Wix Plan
Wix has a free plan! However this plan is unsuitable for anything but a college project! These free websites have Wix adverts all over them. Simply put, visitors to your website won’t view it as credible and won’t spend money with your business.
I should also point out that I have the same view about Gmail addresses for business. They’re just not credible. When I see a business card with a Gmail address, I know I’m not dealing with a professional person. I pay $3/year for my vin@evolutionblogger.com email address!
Combo Plan
The Combo plan is the entry level paid plan at $13/month. The main feature of it is that your website won’t have any Wix adverts. As I said above, this is a minimum requirement for a business website.
Unlimited Plan
The next plan up is the unlimited plan, which costs $17/month. I personally view this option as the best value. There are no bandwidth limits, so an unlimited number of people can visit your site. You also get 10 gb of storage, which is a generous limit.
Once you’ve chosen your price plan, then you can go back to the editor and create your website with Wix. From the screenshot above, you’ll see that we have a 3 page food blog, with “Home”, “Blog” and “About”.
The Wix editor has a top toolbar, a left toolbar and a right toolbar. I don’t use the right toolbar, so I’ won’t cover it in this article. In this section, I’ll cover the functions in the top toolbar.
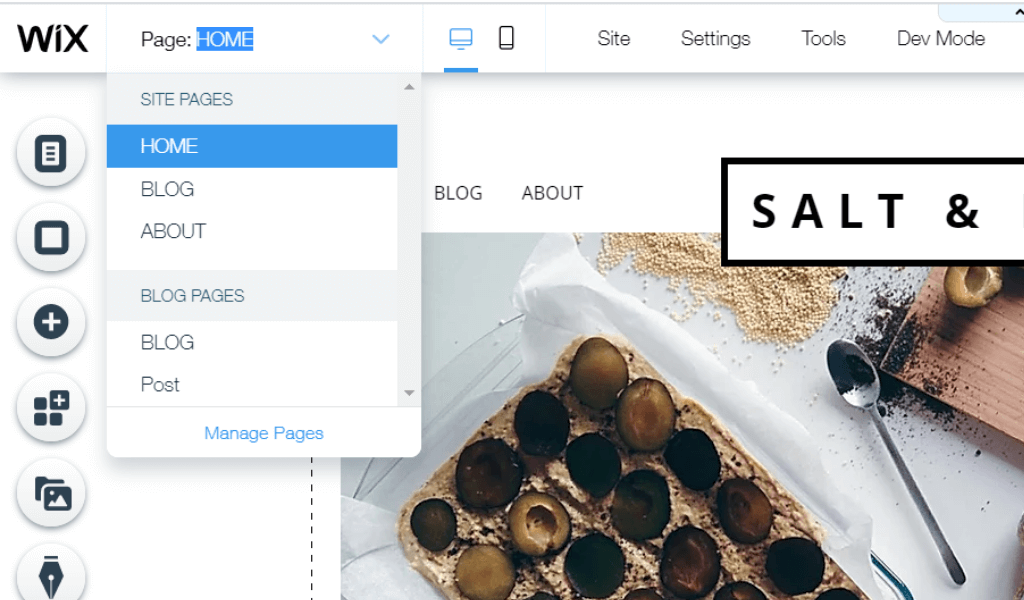
To view a different page on your site (i.e. “Blog”), you need to go to the “Page” option at the top and then choose “Blog”. Screenshot below.
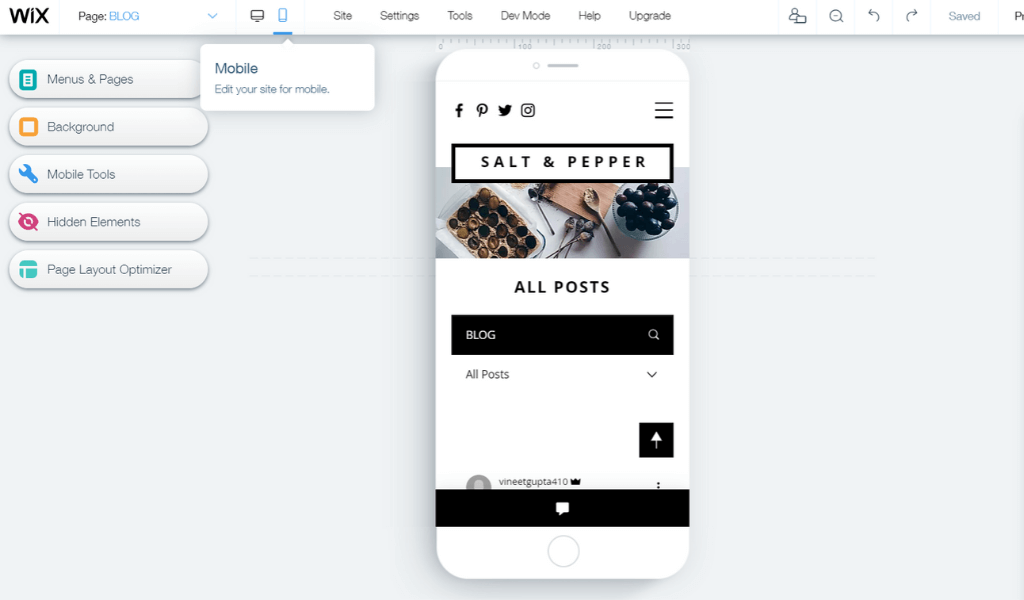
One great feature of Wix, is that the templates work automatically on mobile. There’s an option on the top toolbar to switch the view between desktop and mobile (screenshot below). In today’s market, you must have a site that look good on mobile – it’s not optional! Around 50% of web traffic is on mobile, and that figure is rising. For this blog, 30% of traffic is from mobile.
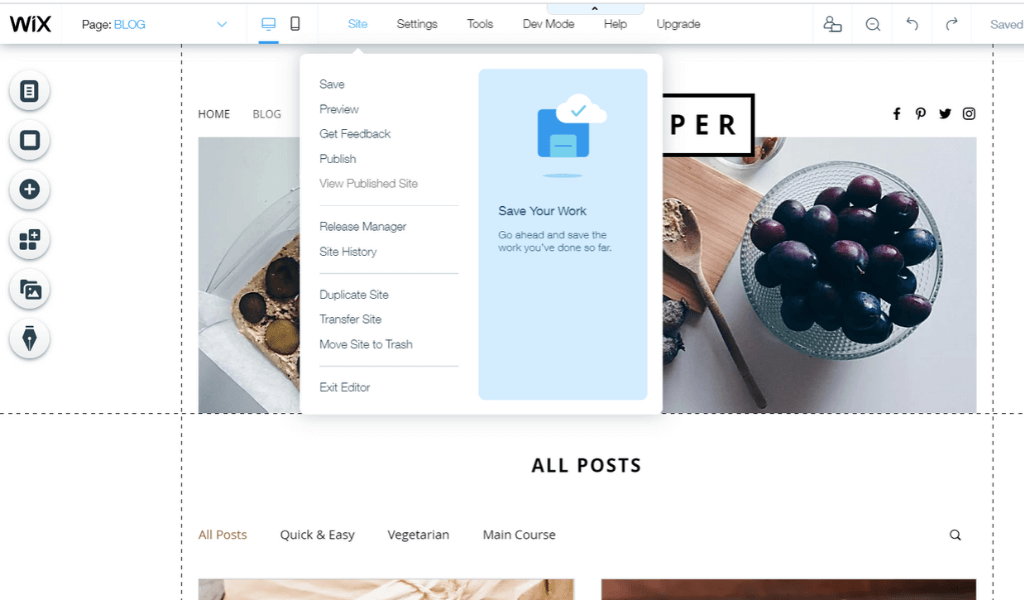
There’s a menu called “site” on the top toolbar with a range of options. These options are shown in the screenshot below:
- You can “Save” your work
- You can “Preview” what your site would look like
- You can “Publish” your website online
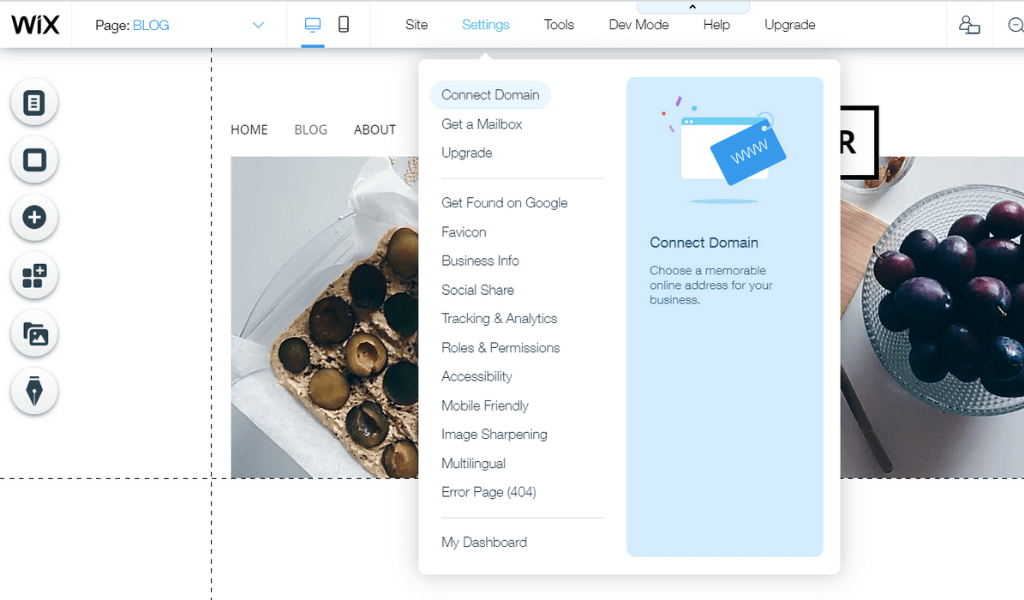
The “Settings” menu is shown in the below screenshot.
- “Connect Domain” enables you to connect this website to a domain name
- “Get a mailbox” enables you to get an email address for your website
- You also have the option to upgrade your Wix membership
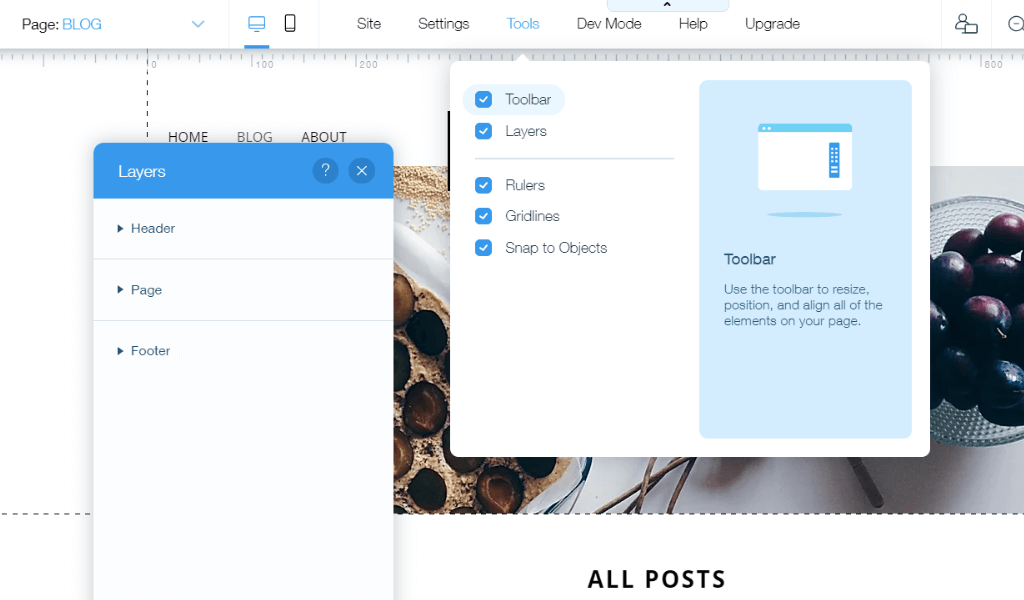
The “Tools” menu is in the below screenshot. It provides different options for tools to edit your website.
- “Toolbar” refers to the right toolbar that I don’t really use
- “Layers” menu allows you to edit the header and footer. The header is the portion of your website at the top, that is shown on every page
- “Snap to objects” is a time saving tool. If you want to replace an image with a new image, then “Snap to objects” means that your new image will be automatically re-sized
On the top toolbar is also an option for “Dev Mode”, which is useful for professional website developers.
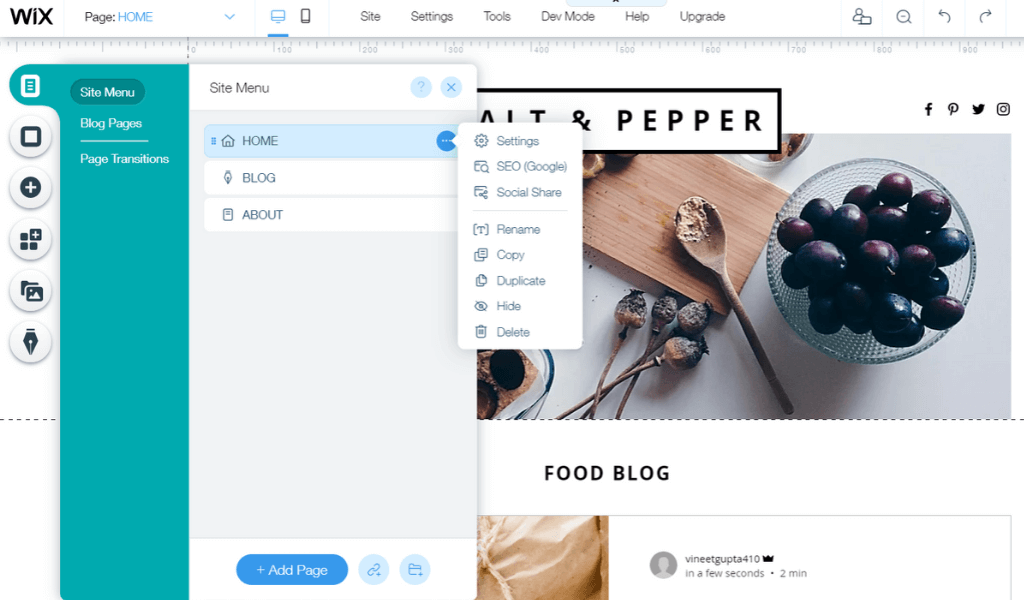
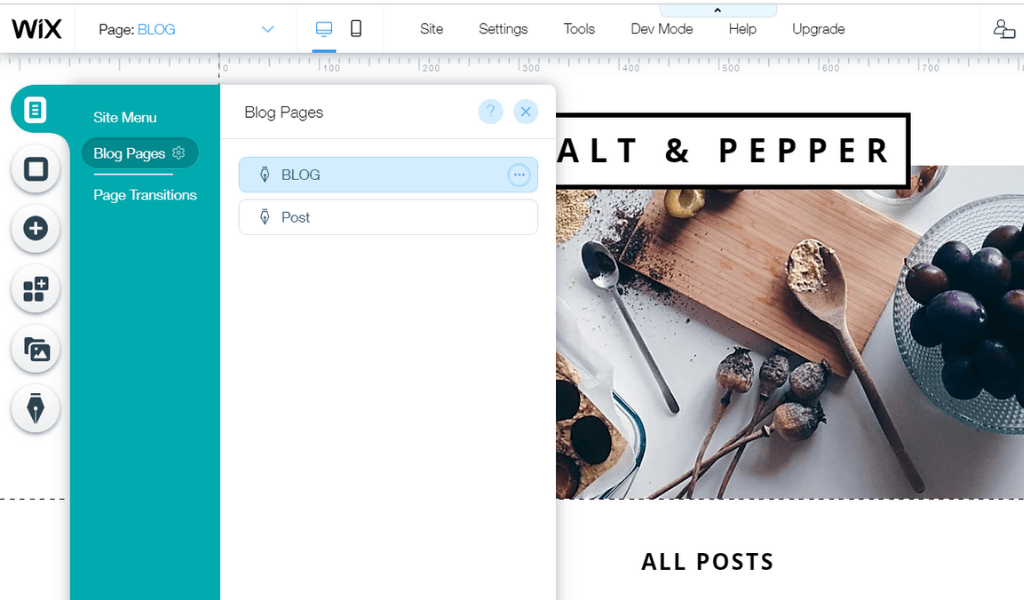
The left toolbar is used for the nitty gritty of editing your site and adding new features. The 1st option is called “Menus & Pages”, and there’s 3 choice in this menu: “Site Menu”, “Blog Pages” and “Page Transitions.” There are 2 screenshots in the above slideshow.
- “Site Menu” enables you to rename existing pages and add new pages
- “Blog Pages” allows you to adjust the settings for the Blog pages
- “Page Transitions” allows you to create an effect as you transition from one page to another
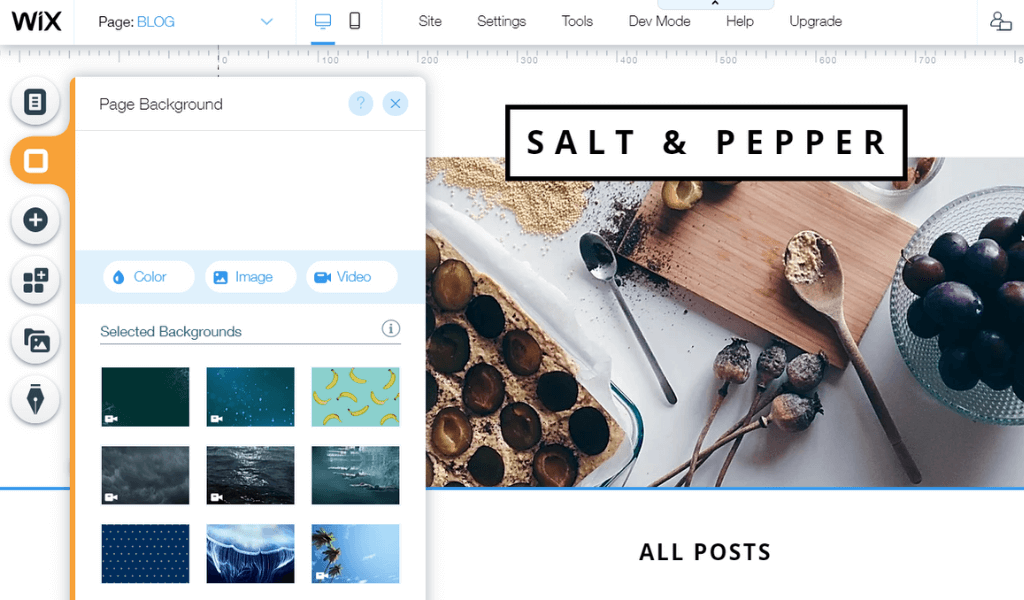
The “Page Background” menu allows you to choose background colours, images and videos for your webpage. Screenshot below
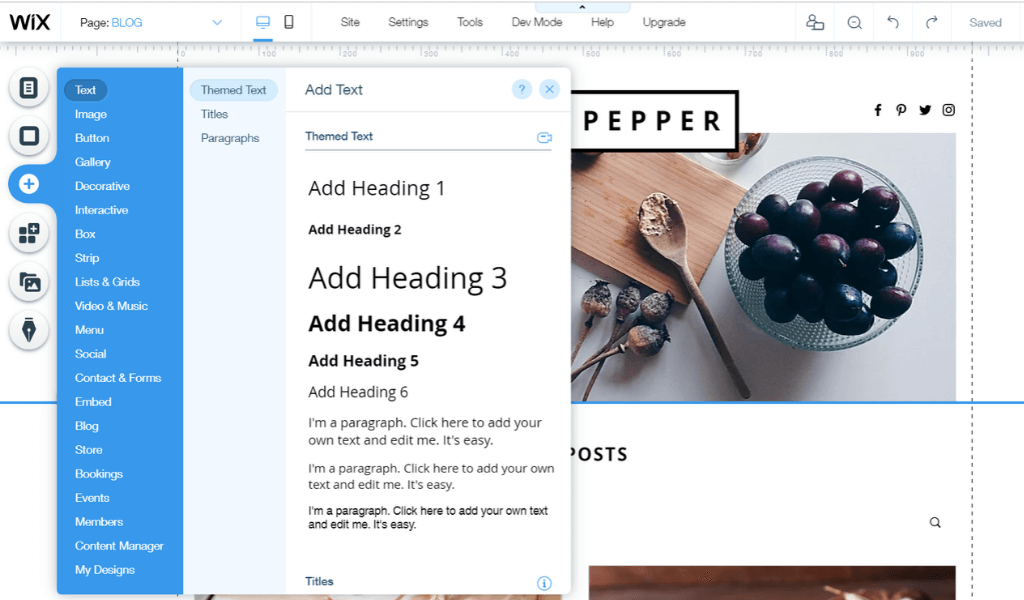
The “Add” menu option has a large array of items that you can add to your website. Screenshot below. The items you can add include:
- Text
- Images
- Buttons
- Social media toolbars
- Many many more!
There are 3 more menus on the left toolbar
- The “Wix App Market” has a range of free and paid apps that you can put on your site
- “Media Menu”: From here you can see your media uploads and access your Media Manager
- “Blog Manager”: From here you can create and manage your blog posts
Now that you’ve been given a summary of the tools, you can edit your template and create your website with Wix. Every element on the site can be adjusted by clicking on it, and then a menu will come up. It’s very intuitive and simple.
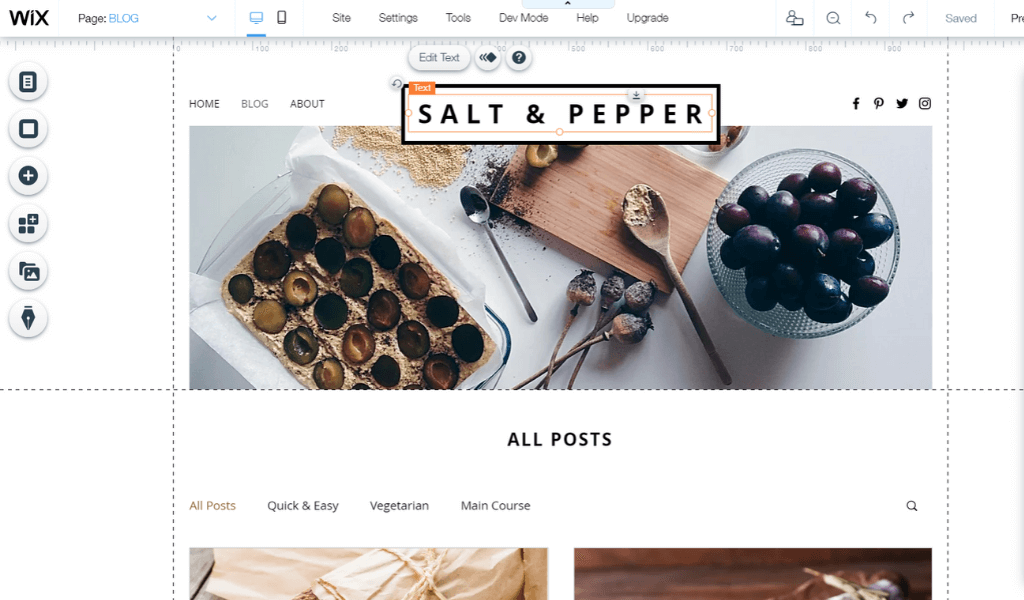
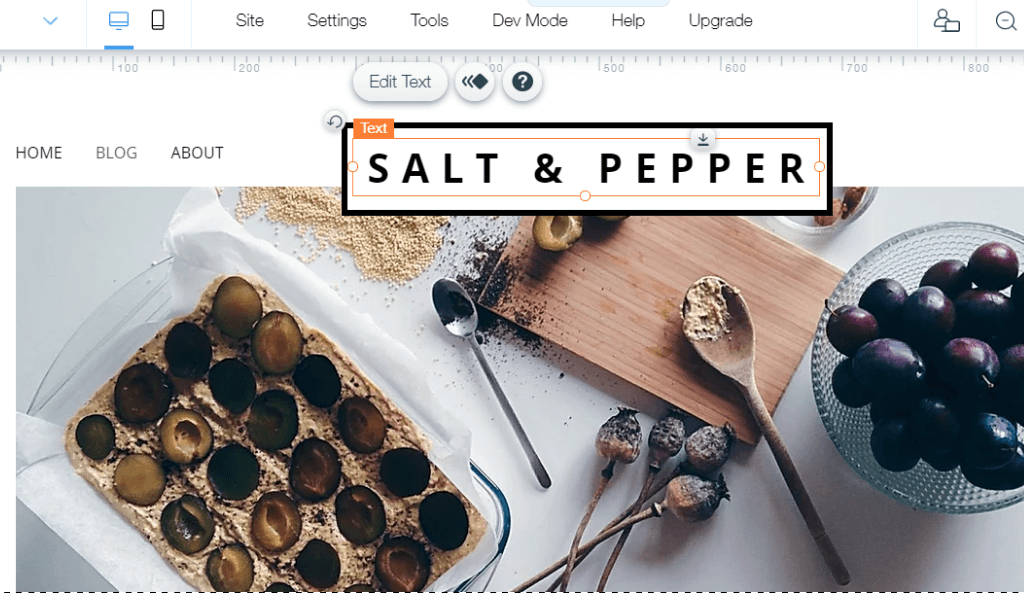
If you click on the “Salt & Pepper” title at the top, a tool menu pops up. It allows you to Edit the text. Screenshot above.
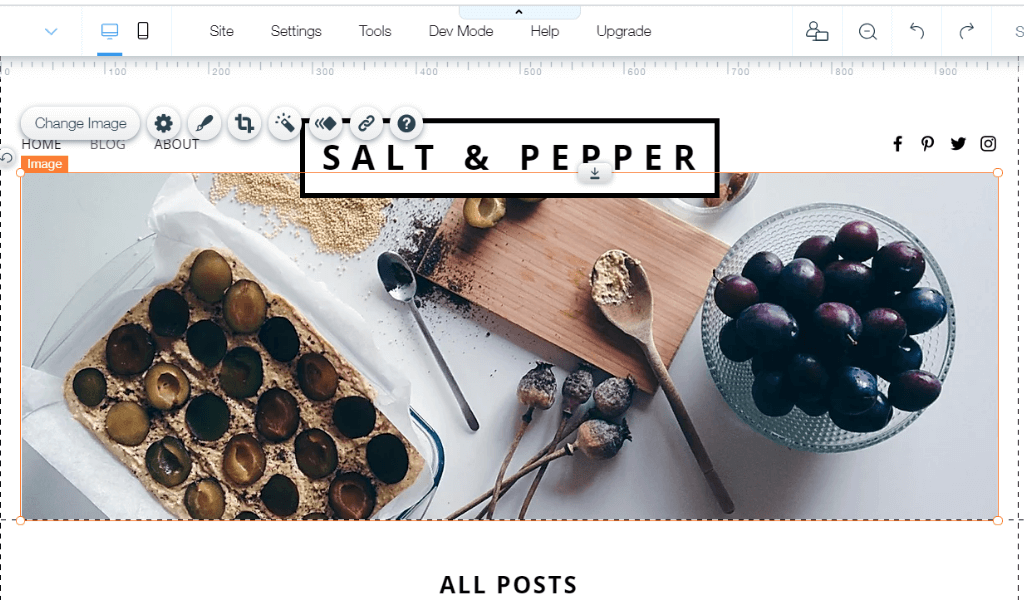
Similarly, if you click on the banner image, a menu comes up. It allows you to change the image or add an effect. Screenshot above.
The process of editing your website isn’t difficult. You simply click any element, and then personalize it for your site. If there’s any items you need to add to your site (e.g. a slideshow), then you can use the left toolbar – as explained in the section above.
To get a basic food blog up with your personal details and images will take under an hour. If you want to grow your site and add new features, then that will take longer. Wix’s website editor really is best in class. If you have a small website, then Wix is a great option to get a decent looking website up quickly.

Wix is a very powerful tool to get a small website up, in a short amount of time. It’s an all in one solution, and low cost too. In this article, I’ve shown how you can create a website with Wix in under 1 hour.
I’m a member of a mastermind community of online entrepreneurs. It’s call SPI Pro. It’s full of podcasters, bloggers and Youtubers. All doing amazing things on the internet.
There are loads of courses on how to make money online. Affiliate Marketing, Podcasting, Youtube, Webinars and Email marketing are all taught. I’ve had amazing results since I joined.

???? + 1.114808 BTC.NEXT - https://graph.org/Message--8529-03-25?hs=45da50fdce04916929f3dee9b692fe44& ????
x5cra6